Lab 1 · Hello Racer
Welcome to the GOAT Racer Labs
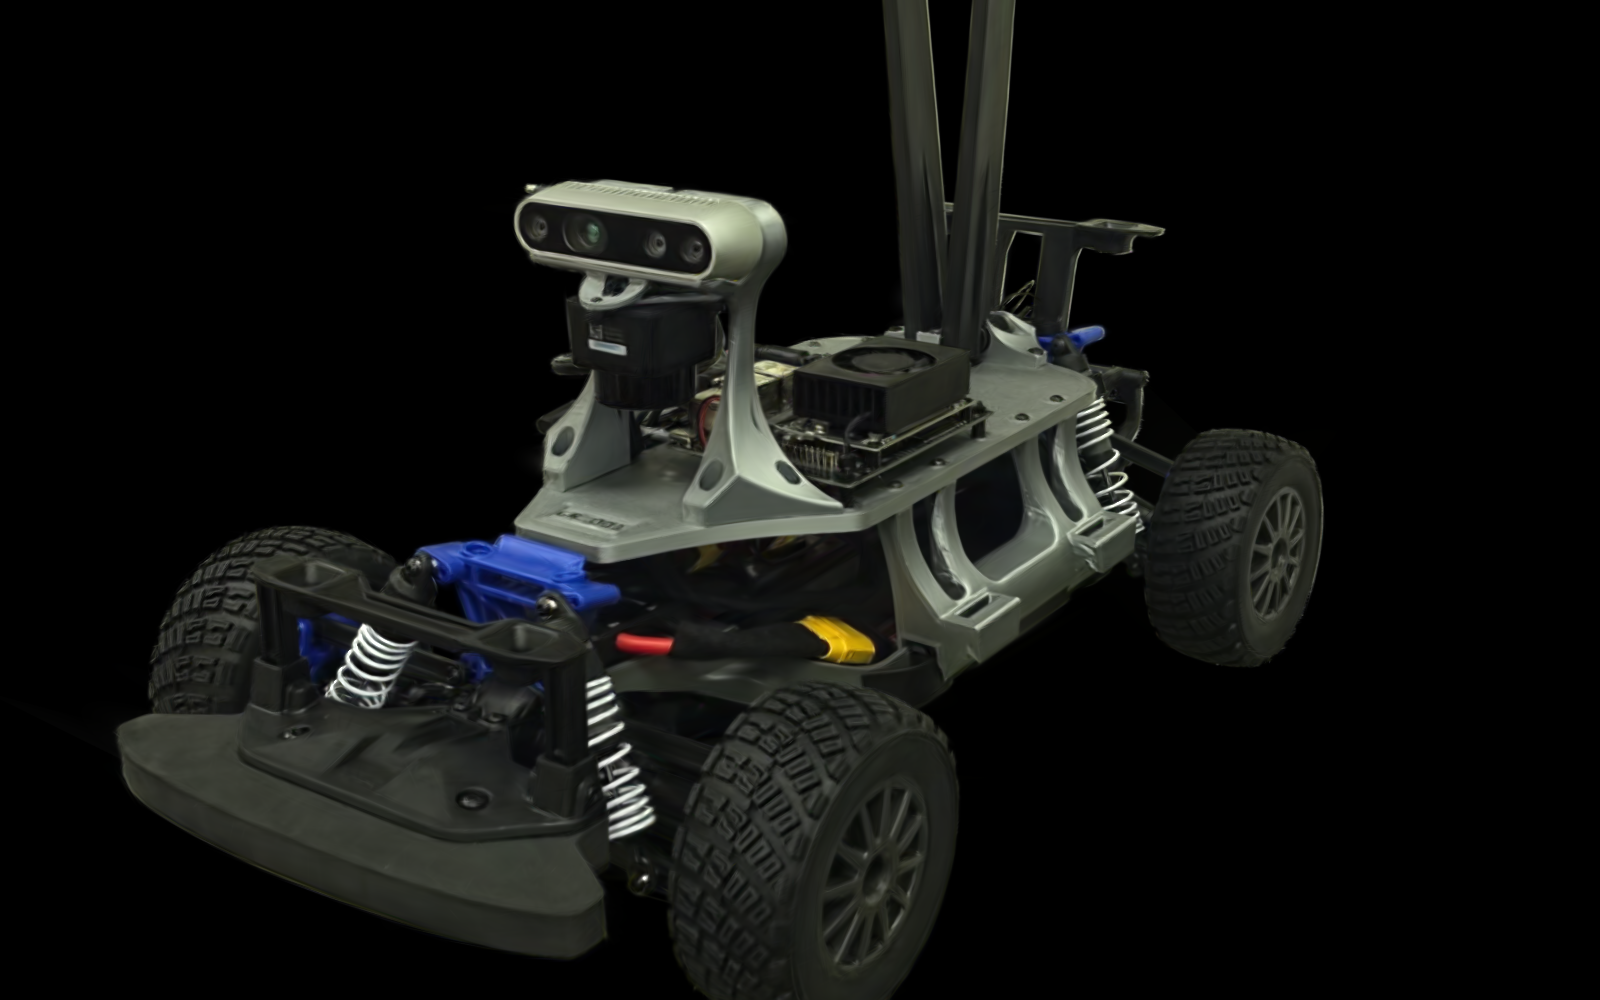
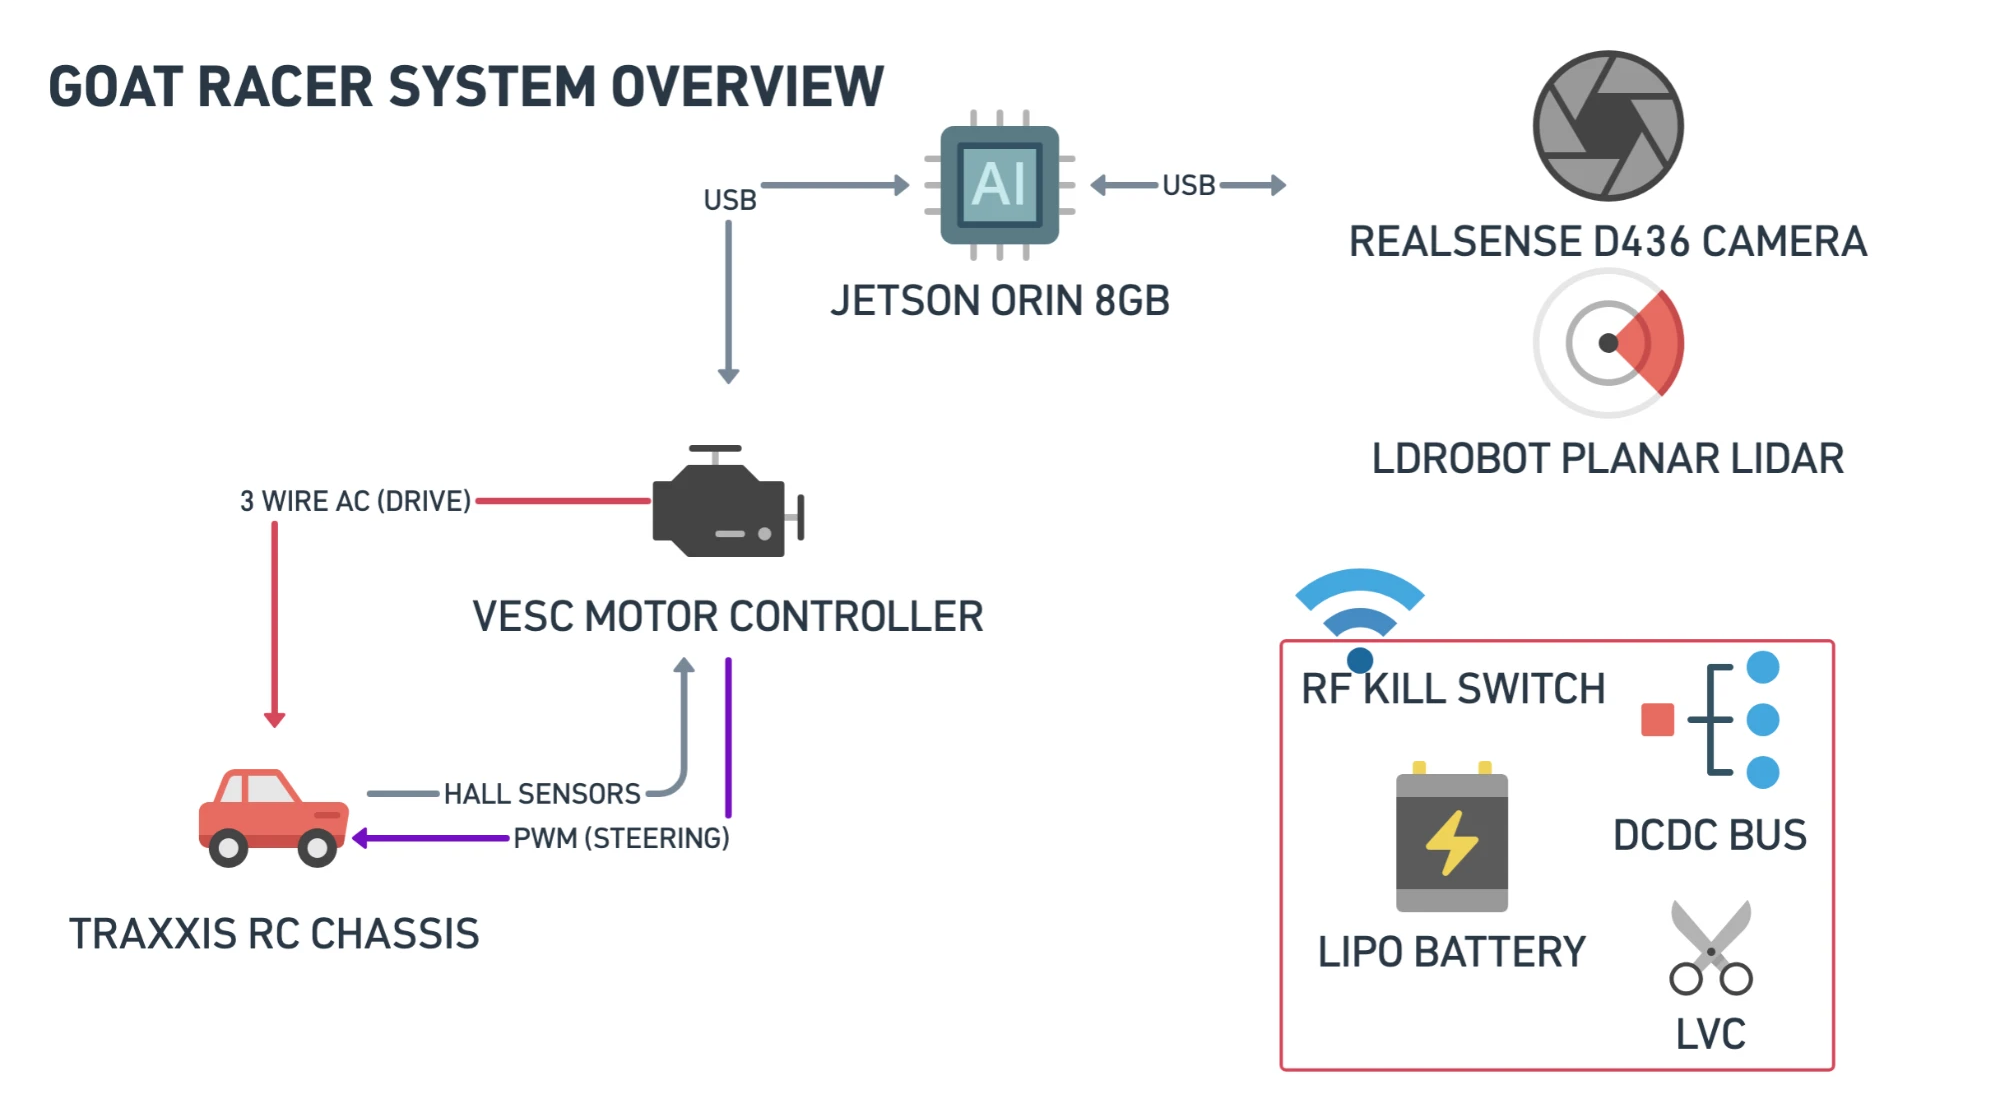
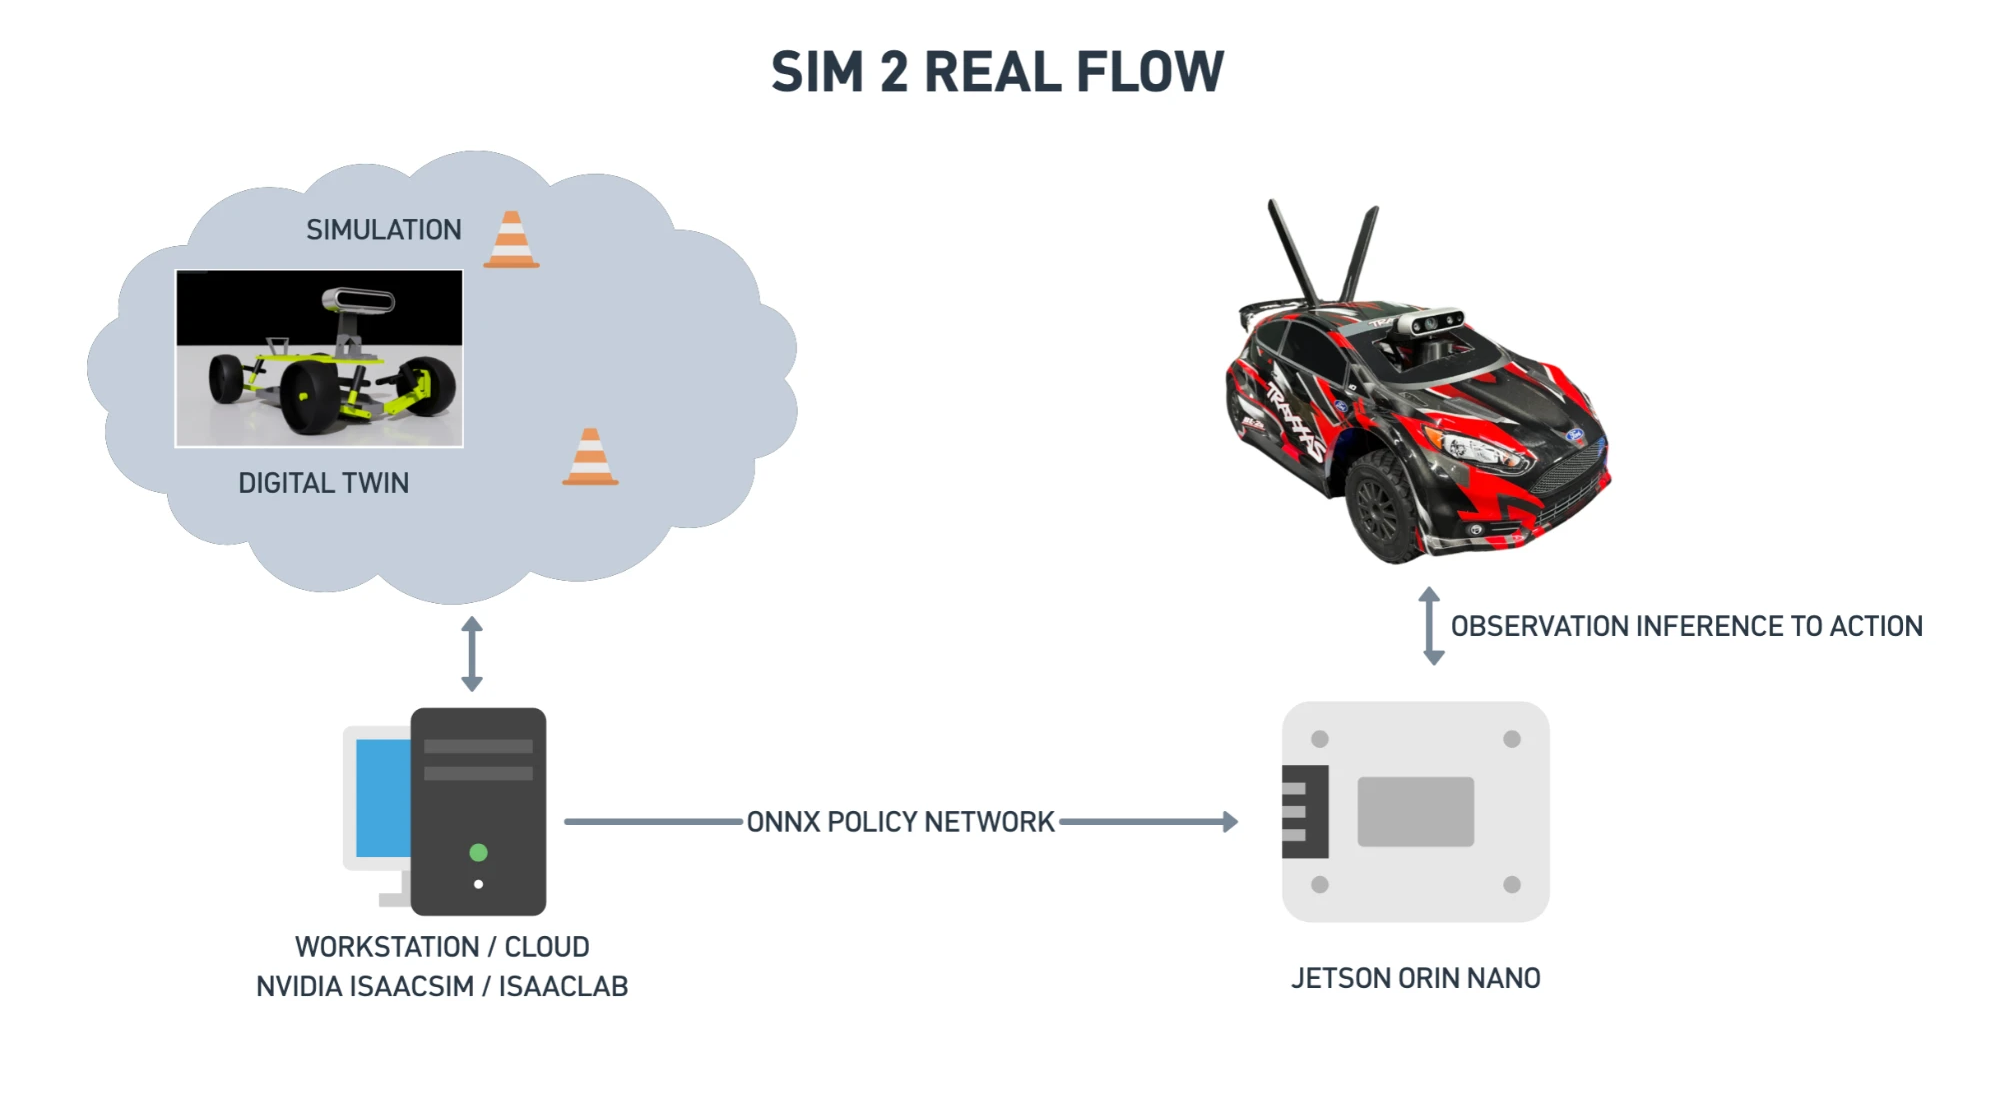
A real robot car, and everything it takes to make it drive itself. Under the shell: an NVIDIA Jetson for the brain, a RealSense depth camera and lidar for the eyes, a VESC for the muscle - all speaking ROS2, and trained in NVIDIA Isaac Sim through a true sim2real pipeline (train in the simulator, drive the real car).
These labs are the whole climb: drive it, teach it to see, put your own code on the wheel, then train a policy (a neural network that drives the car) without you at the wheel. Every lab is three tabs - top right of this page ↗ Read is the manual (you are here), Play is the interactive part (here: drive the simulated car), and Code is real Python, edited and run in your browser. No order is enforced - pick any lab from Labs.
The same lab code runs everywhere: on the car, in the cloud, and - for most of the intro labs - right in your browser. Nothing you write is sent anywhere.
Safety First
Three rules cover almost everything:
- Read the Traxxas safety sheet in the box. It covers the chassis, the motor, the charger and the battery pack. Everything below adds to it, nothing replaces it.
- Do not over-charge or over-discharge the pack. Charge with the balance charger on its LiPo setting and stop at the cell limit. Stop driving when the low-battery warning sounds - the cutoff below is the last line, not the plan.
- Unplug the battery when you plan on storing the car for longer than 24 hours. The low-voltage cutoff saves the pack during a run, not on the shelf.
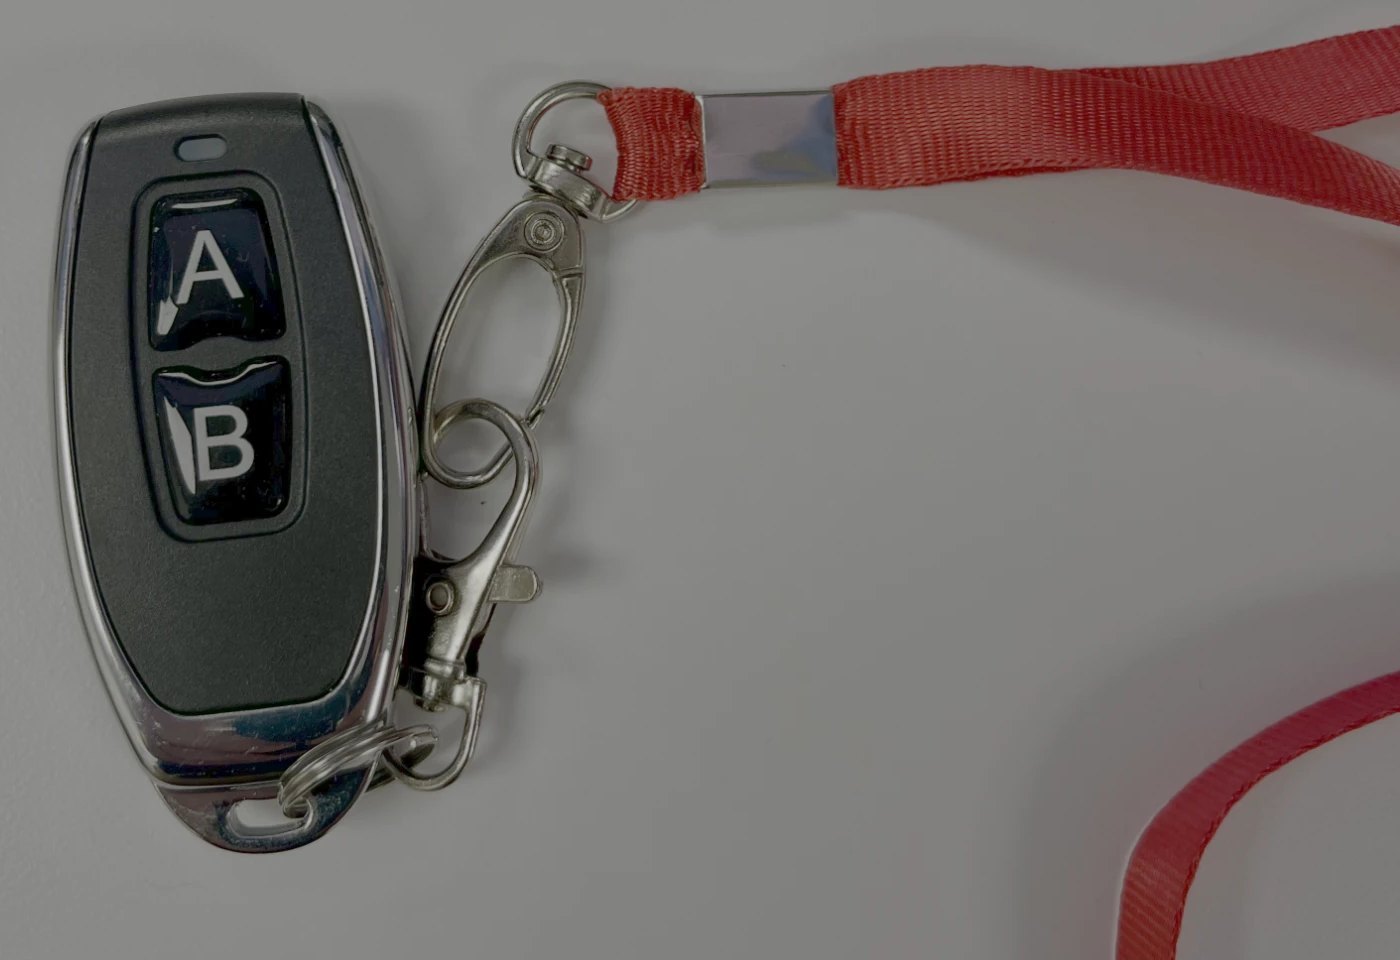
The RF kill switch is your hand brake: a radio remote, independent of wifi and of all the software - it works when everything else is stuck. A arms the car (rising beep pair), B brakes it (falling pair). The robot software only reports ready with the switch armed. Keep the remote in your hand whenever the car can move; B is the answer to everything unexpected.
Teleop
The car boots in teleop mode, and the F710 has a deadman: nothing moves unless you hold it.
You need: battery plugged in, kill-switch remote in hand, F710 with its front switch on X.
- Power on. Wait for the boot beeps.
- Test the kill switch: B brakes (falling pair), A arms (rising pair).
- Pick a preset with the D-pad: left = sticks, right = triggers.
- Hold the deadman - LB (sticks) or A (triggers) - and drive.
- Release the deadman, or lose the link, and the car coasts with centered steering.
Stay within 10 feet of the car - past that the F710 link drops and the car coasts.
Try it on the simulated car: arrow keys / WASD, or an F710 on this computer - same map.
Battery Care
- Warning - the battery is getting low: three mid beeps when stopped, three long high chirps while driving, repeating. Finish the run and charge.
- Cutoff (LVC) - the battery is empty: drive cuts on the spot and the car beeps low-high-low every 5 seconds until power-off. Steering still works; drive does not.
- Both are automatic and battery-driven; the kill switch above is separate and manual.
On the bench, for long stints, power the Jetson from its own adapter (unplug the barrel jack from the battery harness, plug the adapter in). The VESC has its own switch; leave it off unless you need the motor.
The car talks in beep patterns - learn these six:
| Boot OK (armed, battery good) | rising triple, pause, low-high |
| Kill switch armed | rising pair |
| Kill switch disarmed | falling pair |
| Robot software ready | low-low-high |
| Battery warning | three mid beeps stopped; three long high chirps driving |
| Battery cutoff | low-high-low, every 5 s until power-off |
Connect and Configure
- Out of the box the car broadcasts its own access point:
goat-racer, passwordgoatwifi123. Join it and openhttp://192.168.50.1- the dashboard. (No internet while joined - fine for driving.) - To keep internet while you work, join the car to your network
instead (settings, Wi-Fi Network). Then find it at
goat-<name>.local. If nobody reaches the dashboard over wifi within 15 minutes of boot - venue networks often isolate clients - the car falls back to its own AP, so you can always get to it.
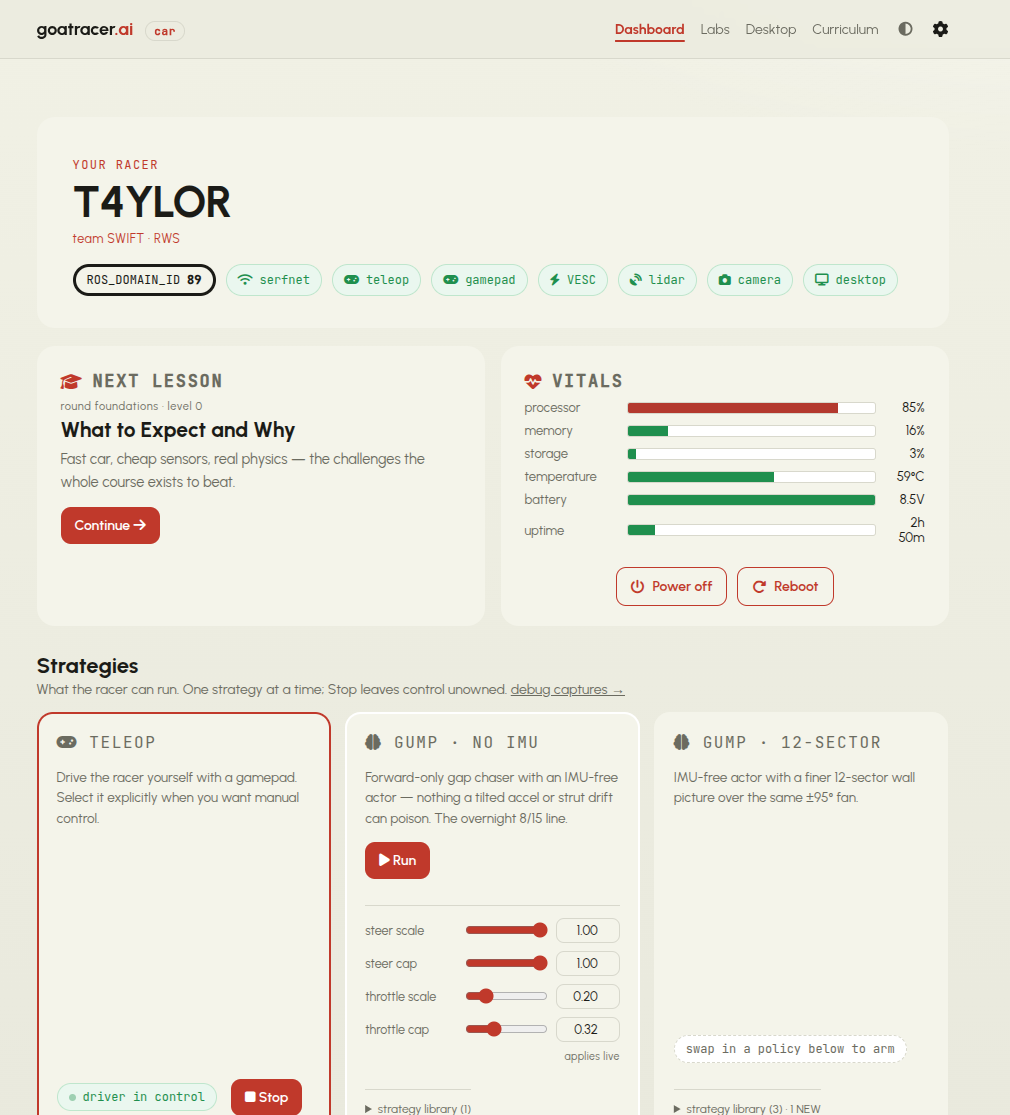
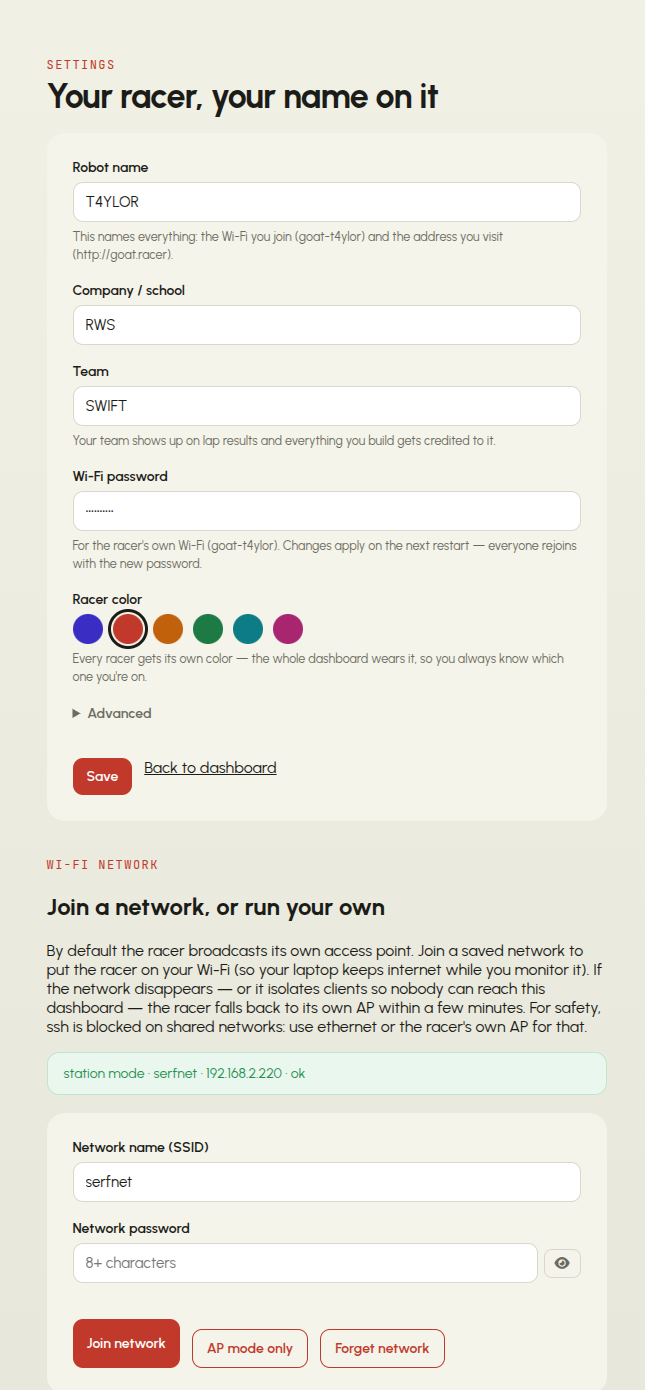
The gear icon opens settings. Set these first:
- Robot name - names everything: the Wi-Fi it
broadcasts (
goat-<name>) and the address you visit. Do this first if two cars are in the room. - Company / school and team - lap results and everything you build get credited to the team.
- Wi-Fi password - for the car's own access point. Applies on the next restart; everyone rejoins with the new one.
- Racer color - the whole dashboard wears it, so you always know which car you are on.
- ROS_DOMAIN_ID (under Advanced) - keeps cars from hearing each other. Give every car in the room a different one.
The Whole Loop
Follow the White Rabbit
The first rabbit hole: where robots like this one come from.
- Shakey the Robot - the first robot that looked at the world and planned what to do (1966). It needed a room of computers and shook so badly it earned the name. Your car runs the same idea, and it fits in your hands.
- What is an AMR? - the family your racer belongs to: robots that sense, decide, and move on their own.
// Next: the Vision labs. They build toward teleop obstacle avoidance - your code pulling the steering while you drive.
// Arrow keys or WASD. The dots are the lidar hitting the walls and the boxes; the readout is the same steer/throttle language the live car, the sim, and a trained policy all speak.
Have an F710? Plug it into this computer, switch it to X, hold LB and drive the sticks - the same map as the car.
- Two numbers in [-1, 1] - steer and throttle - drive everything the car does.
racer.drive(steer, throttle)is the whole API. Pad, policy (the trained neural network), and your code all speak it.- The deadman and the kill switch stop the car below any software.
// what you should be able to do now. Each one traces to a knob or a view in this lab.
- Arm the car with A, brake it with B, and name what each beep pair means.
- Hold the deadman and drive a lap. Release it: the car coasts with centered steering.
- Say what racer.drive(steer, throttle) takes, and what the range of each number is.
- Rename the car in settings and find it again at goat-<name>.local.
// Real Python, run in your browser. It does not run yet: one blank to fill. Fix it, hit Run, then change the numbers and run again.
// the rest of the lab, file by file. Your file is the editor above; these are the exact files that run it. Enough to reproduce the lab outside this page.
car/robot/vision/labs/runners/script_runner.py
"""Script runner: run the student's main.py once and exit. stdout is the
lab's only artifact (Hello Racer). PYTHONPATH=/lab/src puts main first."""

import main  # noqa: F401
Hints
Hint 1: the car does not move
Click the sim once so the page has keyboard focus. Then hold the arrow keys or WASD. On a gamepad, the car only listens while you hold LB (the deadman).
Hint 2: the Code tab prints red text
That is a traceback: Python telling you where it stopped. Read the last
line first (the error name), then the line number above it. Here it is
a SyntaxError on the throttle = ? line: the
? has to be a number. Put 0.3 there and hit Run.
Hint 3: make it your own
Every steer value in the tuple is already legal, so play with the plan:
negate the numbers to swing the other way, repeat the tuple to drive the
S twice, or add 0.75 and 1.0 at the end to steer
harder. Keep every value inside [-1, 1] - the real API refuses anything
outside it.